Wednesday, November 27, 2013

Elf on the Shelf Ideas

Hi Everyone,

Well, last year I was not very active on my blog during this time of year. You know how the holidays go....
Anyway, my boys had an Elf assigned to them by the Big Man in the Red Suit. He was not an official "Elf on the Shelf" but he was much cheaper and my boys like getting a new Elf each year and that just wouldn't be practical with the $30+ OFFICIAL elf. :)

Okay, so I wanted to share the elf antics that our Elf, Tom, was up to last year. He was discovered each morning, having been up to something. Sometimes it was just fun, sometimes it was down right creative!! :)

We do not have the "no touch" rule like the official elf does, I just know if it were me, I couldn't resist touching as a kid. Here are his adventures, one for each day from December 1st through December 24th.


And now, onto the Antics. :)

Day 1: He made a pumpkin snowman out of those little decorative pumpkins. It was held together with toothpicks and decorated with buttons. 

Day 2: He toilet papered the Christmas tree. My boys thought this one was so funny!

Day 3: Tom set up a train under the Christmas tree. We caught him riding on the train.

Day 4: Tom was watching the movie Elf on the couch, he even popped some microwave popcorn.

Day 5: My boy's behavior wasn't wonderful the day before, so on day 5, Tom brought a letter from Santa instead of fun. 
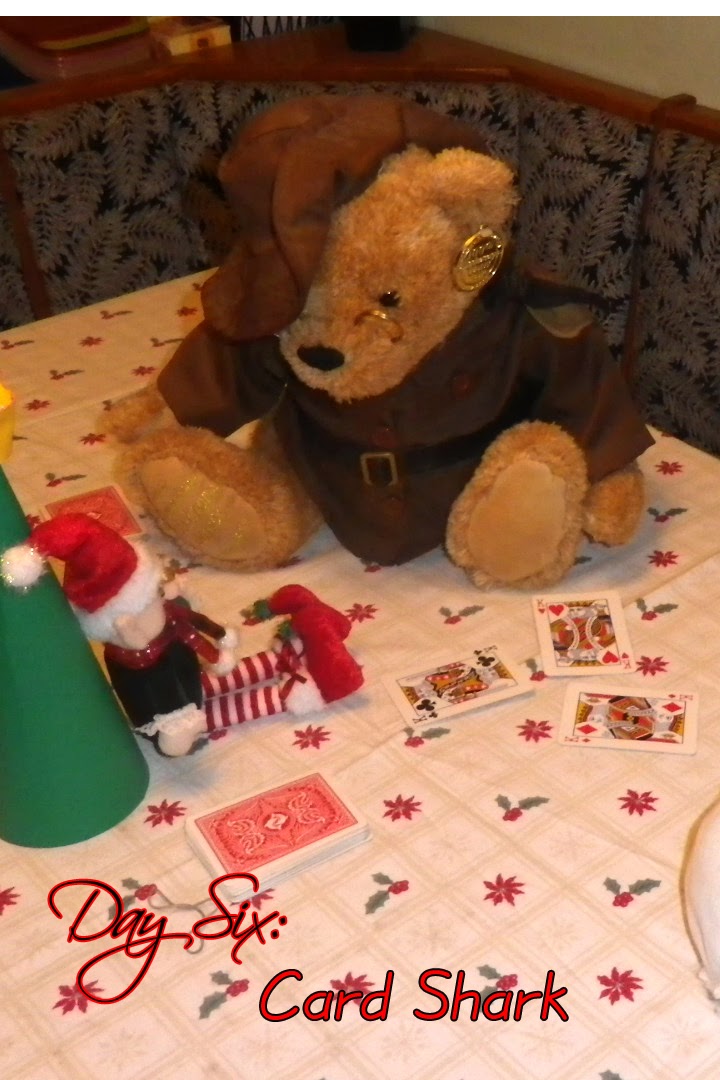
Day 6: Tom was caught in the middle of a card game with a couple other stuffed toys.

Day 7: He gift wrapped up all the breakfast foods for the boys... including spoons, bowls, vitamins and the box of cereal. :)

Day 8: Tom decorated our bathroom!! It was all decked out with lights, snowflakes, a little Christmas tree and a wintery new shower curtain. 

Day 9: My boys LOVE Legos, so on Day 9, Tom brought them the book, "The Christmas Story" told in Lego Bricks and Minifigs. They loved it. :) Tom even had reading glasses on.
 
Day 10: Keeping with the Lego theme, we woke up to find Tom sleeping in a Lego bedroom he'd constructed, complete with nightstand, bed and Christmas tree, he even had legos scattered under his bed like my boys usually do. His blanket was a piece of wrapping paper.

Day 11: Tom delivered bookmarks with the story of the candy cane, a real candy cane and a set of Santa placemats.

Day 12: Tom brought the boys a cute little Santa toy/shelf sitter. He wanted to introduce his old friend and told the story of how Santa got started (the story of St. Nicolas).

Day 13: We were surprised with Tom sitting on the table with a Holiday Funfetti Cake mix, frosting, cupcake liners and a letter from Santa. The letter also included ticket to ride "The Polar Express" and elf-themed jokes and games for the boys to play on the drive to the train station (it was about an hour from us).

Day 14: Apparently Tom missed the North Pole and all the winter snow (we didn't get any last year) so he constructed himself a snowglobe home, complete with snow. All our other snowglobes were set up around Tom's new home.

Day 15: My youngest son loves Angry Birds and received a couple sets of the block toy for his birthday. On day 15, we found Tom in the middle of a game on our dining room table. 

Day 16: Tom was found on the end table, using a candy cane fishing pole to fish for gold fish out of a cup. He even brought his fishing vest and fish basket. 

Day 17: Tom set up a zip-line to ride from the kitchen and across the living room, landing on the Christmas Tree. The boys loved this one so much they made a video. It's on Youtube. :)

Day 18: In honor of the real meaning of Christmas, Tom set up a wall mounted, nativity display. 

Day 19: We found Tom in a heated snowball fight in the kitchen. There were mini marshmallows everywhere. We found lots of "snowballs" mid-flight, strung from the kitchen ceiling. 

Day 20: Tom set up a tire swing. He was riding when we found him, but there was a line of toys waiting for their turn.
Day 21: "Super Tom"! Tom sure was busy! on Day 21, he arrived wearing a cape, mask and under-roos.... Super Tom was there. :)

Day 22: Apparently Tom wasn't cut out to be a super hero.... on Day 22 he was covered with band-aids with a hot water bottle on his head. :(

Day 23: Tom wrapped the boy's door-ways with wrapping paper, essentially sealing them into their bedrooms.  He even remembered to add the bows. :)


Day 24: Tom gave the boys a photo album with pictures of all of his elf adventures during the time he was here visiting. It included a note explaining how Santa will pick him up tonight while he was dropping off the presents, and thanking us for a fun Christmas season. Before we left, we found pics of Tom setting up a camera and tripod on our coffee table. Then we found pics of Santa leaving presents under our tree!! The boys were so amazed!!


This was by far the most fun I've had with the boys, thinking of each of the Elf's adventures. My Facebook friends loved it too, I received lots of feedback when I posted "Adventures of Tom the Elf" each morning. :)


Enjoy your Elf this year, whenever he/she gets there, the Elf is a blessing. I love how the Elf Antics thrilled my boys and just set their imagination on fire! :)

In case you'd like to adopt your own Elf, here is a link to my printable Santa Letters and Elf Passport.

Tuesday, November 26, 2013

Dr. Suess Christmas Subway Art

Hi Everyone,

I just wanted to share some fun Subway Art I created for my Christmas card fronts for this year.

I just love the quote and I've seen it as printables, but not as Subway Art. With the fun trend, I thought it would make a lovely printable for my cards and a wonderful free printable for you too. :) Enjoy.

You can print it as a 8x10 and frame it up for some fun Christmas Decor, or print it for your own Christmas cards too.


Feel free to save this for your own use, but no selling, please.


Wednesday, November 20, 2013

Snowman Advent Garland

Hi everybody.

Snowmen Advent Garland

Today I have a fun project to share with all of you. It's one of those projects that you "ohh" and "ahhh" over on Pinterest.... well, I created it and I just LOVE how it turned out. My two sons are excited to see December 1st arrive so we can start using it too. :)

So I started this project by purchasing some 2" vending machine capsules. While you can go and throw a bunch of quarters at one of those .50c vending machines, my way is cheaper. :) I bought these through an Ebay listing here:

This was the ONLY Ebay store I found that lets you choose your cap colors and the listing was for 25 capsules which is exactly how many I needed for this project. Perfect, right? :) I chose 1/2 red and 1/2 green caps. The caps become the hats for the little snowpeople. 

I started off prepping all the little clear capsules by spraying them with two coats of Valspar's Plastic Primer. This helps the paint stick without peeling, cracking or flaking. If you've ever spray painted plastic that flexes (like these little guys will when you open to fill or reveal the daily surprise will), you'll know how important this step is. 

Alternatively, you can fill the little capsules with shredded white paper if you want to skip the painting all together. It's really up to you, but I had the paint on hand and I thought it would make a much nicer finished project that can be used for years to come.

Next, I added two coats of flat white Valspar spray paint. Make sure you get down to the edges. I love Valspar brand paint because it coats well and doesn't drip like the cheap kinds. :)

While all that paint is drying, you can move onto the next step.

I used my drill gun and added two holes to the top of each cap / snowman hat. I used about an 1/8" drill bit, but it really depends on the ribbon you plan to string the garland onto. If you'd like, you can just use little wire ties to add these little caps to a garland you already have. That would look super cute too. 

I used a large eyed (embroidery style) needle to string my caps onto my 5/8" satin ribbon. I just alternated the colors to form the pattern. Super easy. :)

Okay, next I added Pom-Poms (bought at Dollar Tree) to the tops using hot glue. I added a dot of glue to the center of each cap and placed the pom-pom into the glue. Avoid gluing the pom-pom onto the ribbon. If you glue the pom-pom to just the cap top, the little snowmen can be slid on the garland if need be. 

See, they sure are starting to look like little hats now. Don't you think? 

When the painted capsules are all dry, I used black Tulip puffy paint to add the little faces, two larger dots for the eyes and five little dots for the mouth. I also added the numbers to the back of the snowman heads (but forgot to take a pic, sorry).

While I painted faces, my boys were trimming out simple snowman noses from scraps of orange felt. We applied them to the faces with a little dot of hot glue. Almost done. :)

The last few steps are easy... put your prizes, candies, slips of paper with holiday activities printed on them, etc into the capsules and snap them to the lids/hats. If you need more/less room between them, slid the snowmen on the garland. 

My boys wanted jingle bells on the garland, so we added them by tying them on using a little green sheer ribbon. These little bells will slide as well.

Don't you just love this little snowman face??? So cute but so simple too.

And here is our little sting of happy snowmen. Just awaiting their special day. :)

Here is a shot of the back of our snowmen. I used the same black Tulip Puffy paint to hand-draw the numbers. If you have a die-cut machine, you could use vinyl to add the numbers, but I loved the ease of adding these while I was drawing the faces anyway.

Please feel free to share this project. I am Pinning it using Pinterest here:


And here is my Pinterest.

Thursday, October 31, 2013

Happy Hallowen!!

Hi, and welcome to the Creepy Cricut Creations Blog Hop!!


 If you've come from Lori at Scrappin' My Stress Away, you are in the right place! If you just came across the hop, please start at the beginning over at Jenny's Blog, Crazy About Cricut.

 I absolutely LOVE crafting with my boys... so they sure helped out on this one! They love being involved and I enjoy the special time with them too.

My boys and I created this deconstructed witch wreath. They love it, we had a great time and it's now proudly displayed next to our front door. 


We stared with the following:
an 18" grapevine wreath
a fall leaves garland
some fall themed wired ribbon
a set of Halloween mini lights
a Glittered witches broom (from Joanns)
Cricut Cuts to decorate the wreath


My boys wrapped and wrapped. First we added the fall leaves garland, then the Halloween lights and then the wired ribbon. We used a little crafting wire to attach the decorations to the wreath when needed. We also wired the broom to the wreath (fyi: we sprayed the glittered broom with cheap-o Dollar Tree hair spray to keep the glitter from falling off).


Here are the cuts we decided to add to our wreath:
A witch hat from Paper Doll Dress Up
(cut at 8" wide)
Witches Shoes from  Paper Doll Dress Up
(cut at 3")
Happy Halloween from Holiday Cakes
(cut at 3")
Witches legs 
cut at 1 1/2" x 5" (we added alternating colored stripes)
Buckles from Fabulous Finds
(cut at 1")

We then ran our witch's pieces through our laminator (to protect them from the elements) and hung the wreath outside - it's under our deck but it doesn't hurt to protect our paper pieces.

  1. Jenny - http://crazyaboutcricut.blogspot.com/
  2. Lori - http://scrappinmystressaway.blogspot.com/
  3. Cheryl - http://cardsbycg.blogspot.com/
  4. Wandy - http://greenapplescrapper.blogspot.com
  5. Heather- http://paper-junkie.blogspot.com
  6. Sarah - http://sarahvaitstamps.blogspot.com
  7. Tracy - http://lovesbuggin.blogspot.com/
  8. Carol - http://www.workmanscraps.com
  9. Elizabeth - http://www.ejoym.blogspot.com
  10. Amanda- http://amandascraftsandmore.blogspot.com/
Your next stop will be
 Wandy at Green Apple Scrapper!